BC Webcams Highway 1

BC Webcams Highway 1

BC Webcams Highway 1
Horseshoe Bay BC Webcams Highway 1 ramp at Horseshoe Bay, looking east.
Webcam Image: Horseshoe Bay
Horseshoe Bay BC Webcams Highway 1 ramp at Horseshoe Bay, looking east.
Webcam Image: Ironworkers-S
Ironworkers-S Ironworker’s Memorial Bridge, south end, looking south.
Webcam Image: Cassiar-S
Cassiar-S Cassiar Tunnel – South Portal looking south on Hwy1.
Webcam Image: Douglas Rd - E
Douglas Rd – E BC Webcams Highway 1 at Douglas Rd overpass, looking east.
Webcam Image: Douglas Rd - W
Douglas Rd – W BC Webcams Highway 1 at Willingdon Ave, looking west.
Webcam Image: Kensington-W
Kensington-W BC Webcams Highway 1 at Kensington Ave, looking west.
Webcam Image: Kensington-E
Kensington-E BC Webcams Highway 1 at Kensington Ave, looking east.

Webcam Image: Burnaby - E
Burnaby – E BC Webcams Highway 1, about 500m west of Gaglardi Way, looking east.
Webcam Image: Burnaby - W
Burnaby – W BC Webcams Highway 1, about 500m west of Gaglardi Way, looking west.
Webcam Image: Port Mann Bridge - E
Port Mann Bridge – E BC Webcams Highway 1 at Port Mann Bridge, looking eastbound.
Webcam Image: Port Mann Bridge - W
Port Mann Bridge – W BC Webcams Highway 1 at Port Mann Bridge, looking westbound.
Webcam Image: Hwy 1 at 232nd St - N
Hwy 1 at 232nd St – N BC Webcams Highway 1 westbound on-ramp from 232nd St, looking north.
Webcam Image: Hwy 1 at 232nd St - W
Hwy 1 at 232nd St – W BC Webcams Highway 1 at 232nd St. overpass, looking west.
Webcam Image: Hwy 1 at 232nd St - E
Hwy 1 at 232nd St – E BC Webcams Highway 1, at 232nd Street Overpass, looking east.
Webcam Image: Hwy 1 at 232nd St - S
Hwy 1 at 232nd St – S BC Webcams Highway 1eastbound on-ramp from 232nd St, looking south.
Webcam Image: Hwy 1 at 264th St - N
Hwy 1 at 264th St – N BC Webcams Highway 1 off-ramp to 264th Street, looking north.
Webcam Image: Hwy 1 at 264th St - W
Hwy 1 at 264th St – W BC Webcams Highway 1 at 264th St, looking west.
Webcam Image: Hwy 1 at 264th St - E
Hwy 1 at 264th St – E BC Webcams Highway 1 at 264th St, looking east.
Webcam Image: Hwy 1 at 264th St - S
Hwy 1 at 264th St – S BC Webcams Highway 1 on-ramp from 264th Street, looking south.
Webcam Image: Bradner Rd
Bradner Rd BC Webcams Highway 1, west of Abbotsford near Bradner Road, looking east.
Webcam Image: Bradner Rd - W
Bradner Rd – W BC Webcams Highway 1, west of Abbotsford near Bradner Road, looking west.
Webcam Image: Bradner Rd - E
Bradner Rd – E BC Webcams Highway 1, eastbound west of Abbotsford near Bradner Road, looking east.
Webcam Image: Mt Lehman - N
Mt Lehman – N BC Webcams Highway 1 at Mt. Lehman Rd, looking north.
Webcam Image: Mt Lehman - W
Mt Lehman – W BC Webcams Highway 1 at Mt. Lehman Rd, looking west.
Webcam Image: Mt Lehman - E
Mt Lehman – E HBC Webcams Highway 1 at Mt. Lehman Rd, looking east.
Webcam Image: Mt Lehman - S
Mt Lehman – S BC Webcams Highway 1 at Mt. Lehman Rd, looking south.
Webcam Image: Clearbrook - N
Clearbrook – N BC Webcams Highway 1 at Clearbrook Rd, looking north.
Webcam Image: Clearbrook - W
Clearbrook – W Hwy 1 at Clearbrook Rd, looking west.
Webcam Image: Clearbrook - E
Clearbrook – E Hwy 1 at Clearbrook Rd, looking east.
Webcam Image: Clearbrook - S
Clearbrook – S Hwy 1 at Clearbrook Rd, looking south.
Webcam Image: McCallum Road - W
McCallum Road – W Hwy 1 at McCallum Road overpass, looking west.
Webcam Image: McCallum Road - E
McCallum Road – E Hwy 1 at McCallum Rd overpass, looking east.
Webcam Image: McCallum Rd Roundabout Northbound
McCallum Rd Roundabout Northbound McCallum Rd roundabout, looking north.
Webcam Image: McCallum Rd Roundabout Southbound
McCallum Rd Roundabout Southbound McCallum Rd roundabout, looking south.
Webcam Image: Sumas Way - N
Sumas Way – N Hwy 1 at Hwy 11 (Sumas Way) in Abbotsford, looking north.
Webcam Image: Sumas Way - W
Sumas Way – W Hwy 1 at Hwy 11 (Sumas Way) in Abbotsford, looking west.
Webcam Image: Sumas Way - E
Sumas Way – E Hwy 1 at Hwy 11 (Sumas Way) in Abbotsford, looking east.
Webcam Image: Sumas Way - S
Sumas Way – S Hwy 1 at Hwy 11 (Sumas Way) in Abbotsford, looking south.
Webcam Image: Cole Rd.
Cole Rd. Hwy 1 at Cole Road Rest Area, looking east.
Webcam Image: Evans Road
Evans Road Hwy 1 at Evans Road overpass near Chilliwack, looking east.
Webcam Image: Chilliwack Lake
Chilliwack Lake Chilliwack Lake Rd, at Paulsen Rd. About 42 km east of Chilliwack, looking east.
Webcam Image: Annis Rd-N
Annis Rd-N Hwy 1 at Annis Rd, looking north.
Webcam Image: Annis Rd-W
Annis Rd-W Hwy 1 at Annis Rd, looking west.
Webcam Image: Annis Rd-E
Annis Rd-E Hwy 1 at Annis Rd, looking east.
Webcam Image: Annis Rd-S
Annis Rd-S Hwy 1 at Annis Rd, looking south.
Webcam Image: Prest Rd - N
Prest Rd – N Hwy 1 at Prest Rd, Chilliwack, looking north.
Webcam Image: Prest Rd - W
Prest Rd – W Hwy 1 at Prest Rd, Chilliwack, looking west.
Webcam Image: Prest Rd - E
Prest Rd – E Hwy 1 at Prest Rd, Chilliwack, looking east.
Webcam Image: Prest Rd - S
Prest Rd – S Hwy 1 at Prest Rd, Chilliwack, looking south.
Webcam Image: Bridal Falls
Bridal Falls Hwy 1 near Bridal Falls, looking east.
Webcam Image: Hunter Creek
Hunter Creek Hwy 1 at Hunter Creek, looking east.
Webcam Image: Mary Hill Bypass at Shaughnessy - W
Mary Hill Bypass at Shaughnessy – W Hwy 7B/Mary Hill Bypass at Shaughnessy St looking west.
Webcam Image: Mary Hill Bypass at Shaughnessy - E
Mary Hill Bypass at Shaughnessy – E Hwy 7B/Mary Hill Bypass at Shaughnessy St looking east.
Webcam Image: Mary Hill Bypass
Mary Hill Bypass Hwy 7B, on Mary Hill, looking South-West towards Coquitlam.
 
Webcam Image: Lougheed at Kennedy Rd.
Lougheed at Kennedy Rd. Hwy7 (Lougheed Hwy) at Kennedy Road, looking northwest towards Pitt River Bridge.
Webcam Image: Pitt River Bridge
Pitt River Bridge Pitt River Bridge deck, northwest view from Lougheed Hwy at Kennedy Rd.
Webcam Image: Pitt Meadows
Pitt Meadows Hwy 7 (Lougheed Hwy) at Kennedy Rd, zoomed southeast, towards Pitt Meadows.
Webcam Image: Lougheed Hwy
Lougheed Hwy Hwy 7 (Lougheed Hwy) at Kennedy Road, looking southeast.
Webcam Image: Lougheed at Harris Rd - N
Lougheed at Harris Rd – N Hwy7 (Lougheed Hwy) at Harris Road, looking north.
Webcam Image: Lougheed at Harris Rd - W
Lougheed at Harris Rd – W Hwy7 (Lougheed Hwy) at Harris Road, looking west.
Webcam Image: Lougheed at Harris Rd - E
Lougheed at Harris Rd – E Hwy7 (Lougheed Hwy) at Harris Road, looking east.
Webcam Image: Lougheed at Harris Rd - S
Lougheed at Harris Rd – S Hwy7 (Lougheed Hwy) at Harris Road, looking south.
Webcam Image: Lougheed at Dewdney Trunk Rd - N
Lougheed at Dewdney Trunk Rd – N Lougheed Hwy looking north onto Dewdney Trunk Rd.
Webcam Image: Lougheed at Dewdney Trunk Rd - W
Lougheed at Dewdney Trunk Rd – W Lougheed Hwy looking west.
Webcam Image: Lougheed at Dewdney Trunk Rd - E
Lougheed at Dewdney Trunk Rd – E Lougheed Highway looking east.
Webcam Image: Lougheed at Maple Meadows Way - S
Lougheed at Maple Meadows Way – S Lougheed Hwy looking south onto Maple Meadows Way.
Webcam Image: Albion - N
Albion – N Hwy 7 (Lougheed Hwy) at 240th St, looking north along 240th St.
Webcam Image: Albion - W
Albion – W Hwy 7 (Lougheed Hwy) at 240th St, looking west along Hwy 7.
Webcam Image: Albion - E
Albion – E Hwy 7 (Lougheed Hwy) at 240th St, looking east along Hwy 7.
Webcam Image: Albion - S
Albion – S Hwy 7 (Lougheed Hwy) at 240th St, looking south along 240th St.
Webcam Image: Silverdale - N
Silverdale – N Hwy 7 (Lougheed Hwy) at Hayward St in Mission, looking north-east along Hayward St.
Webcam Image: Silverdale - W
Silverdale – W Hwy 7 (Lougheed Hwy) at Hayward St in Mission, looking north-west along Hwy 7.
Webcam Image: Silverdale - E
Silverdale – E Hwy 7 (Lougheed Hwy) at Hayward St in Mission, looking south-east along Hwy 7.
Webcam Image: Silverdale - S
Silverdale – S Hwy 7 (Lougheed Hwy) at Hayward St in Mission, looking south-west along Hayward St.
Webcam Image: Mission - N
Mission – N Hwy 7 at Hwy 11 approaching Mission, looking north.
Webcam Image: Mission - W
Mission – W Hwy 7 at Hwy 11 approaching Mission, looking west.
Webcam Image: Mission - E
Mission – E Hwy 7 at Hwy 11 approaching Mission, looking east.
Webcam Image: Mission - S
Mission – S Hwy 7 at Hwy 11 approaching Mission, looking south.
Webcam Image: Deroche - E
Deroche – E Hwy 7 at Deroche Rd and Nicomen Rd railway crossing, looking east.
Webcam Image: Deroche - W
Deroche – W Hwy 7 at Deroche Rd and Nicomen Rd railway crossing, looking west.
Webcam Image: Highlands Blvd
Highlands Blvd Hwy 7 (Lougheed Hwy) at Highlands Blvd, approximately 3 km east of Harrison Mills, looking east.
Webcam Image: Agassiz
Agassiz Hwy 7 at Hwy 9 (Evergreen Drive) in Agassiz, looking east.

Webcam Image: Hope
Hope Hwy 1 at Hwy 7 near Hope, looking west.
Webcam Image: Hwy 9 at Agassiz-Rosedale Bridge
Hwy 9 at Agassiz-Rosedale Bridge Hwy 9 at Rosedale Bridge on north side, looking south.
Webcam Image: Hwy 10 at 152nd-N
Hwy 10 at 152nd-N Hwy 10 at 152nd Street, looking north on 152nd.
Webcam Image: Hwy 10 at 152nd-W
Hwy 10 at 152nd-W Hwy 10 at 152nd Street, looking west on Hwy 10.
Webcam Image: Hwy 10 at 152nd-E
Hwy 10 at 152nd-E Hwy 10 at 152nd Street, looking east on Hwy 10.
Webcam Image: Hwy 10 at 152nd-S
Hwy 10 at 152nd-S Hwy 10 at 152nd Street, looking south on 152nd.
  
Webcam Image: Hwy 10 at Fraser Hwy - NW
Hwy 10 at Fraser Hwy – NW Hwy 10 at Fraser Hwy in Langley, looking northwest.
Webcam Image: Hwy 10 at Fraser Hwy - NE
Hwy 10 at Fraser Hwy – NE Hwy 10 at Fraser Hwy in Langley, looking northwest.
Webcam Image: Hwy 10 at Fraser Hwy - SW
Hwy 10 at Fraser Hwy – SW Hwy 10 at Fraser Hwy in Langley, looking southwest.
Webcam Image: Hwy 10 at Fraser Hwy - SE
Hwy 10 at Fraser Hwy – SE Hwy 10 at Fraser Hwy in Langley, looking southeast.
Webcam Image: Hwy 10 at 200th St - N
Hwy 10 at 200th St – N Hwy 10 at 200th St in Langley, looking north.
Webcam Image: Hwy 10 at 200th St - W
Hwy 10 at 200th St – W Hwy 10 at 200th St in Langley, looking west.
Webcam Image: Hwy 10 at 200th St - E
Hwy 10 at 200th St – E Hwy 10 at 200th St in Langley, looking east.
Webcam Image: Hwy 10 at 200th St - S
Hwy 10 at 200th St – S Hwy 10 at 200th St in Langley, looking south.
Webcam Image: Hwy 11 at Harris Rd - N
Hwy 11 at Harris Rd – N Hwy 11 at Harris Rd, looking north
Webcam Image: Hwy 11 at Harris Rd - W
Hwy 11 at Harris Rd – W Hwy 11 at Harris Rd, looking west.
Webcam Image: Hwy 11 at Harris Rd - E
Hwy 11 at Harris Rd – E Hwy 11 at Harris Rd, looking east
Webcam Image: Hwy 11 at Harris Rd - S
Hwy 11 at Harris Rd – S Hwy 11 at Harris Rd, looking south.

Webcam Image: Hwy 15 at FH-N
Hwy 15 at FH-N Hwy 15 at Fraser Hwy (1A) looking north on Hwy 15
Webcam Image: Hwy 15 at FH-W
Hwy 15 at FH-W Hwy 15 at Fraser Hwy (1A) looking north-west on Fraser Hwy
Webcam Image: Hwy 15 at FH-E
Hwy 15 at FH-E Hwy 15 at Fraser Hwy (1A) looking south-east on Fraser Hwy
Webcam Image: Hwy 15 at FH-S
Hwy 15 at FH-S Hwy 15 at Fraser Hwy (1A) looking south on Hwy 15
Webcam Image: Hwy 15 at Hwy 10 - N
Hwy 15 at Hwy 10 – N Hwy 15 at Hwy 10, looking north on Hwy 15
Webcam Image: Hwy 15 at Hwy 10 - E
Hwy 15 at Hwy 10 – E Hwy 15 at Hwy 10, looking east on Hwy 10
Webcam Image: Hwy 15 at Hwy 10 - S
Hwy 15 at Hwy 10 – S Hwy 15 at Hwy 10, looking south on Hwy 15.
 
Webcam Image: Hwy 17A at Hwy 10 - N
Hwy 17A at Hwy 10 – N Hwy 17A, about 0.5 km south of Hwy 10 in Delta, looking north.
Webcam Image: Hwy 17A at Hwy 10 - S
Hwy 17A at Hwy 10 – S Hwy 17A, about 0.5 km south of Hwy 10 in Delta, looking south.
  
Webcam Image: Tannery Rd Overpass - W
Tannery Rd Overpass – W Hwy 17 (South Fraser Perimeter Rd) at Tannery Rd Overpass in Surrey, looking west.
Webcam Image: Tannery Rd Overpass - E
Tannery Rd Overpass – E Hwy 17 (South Fraser Perimeter Rd) at Tannery Rd Overpass in Surrey, looking east.
Webcam Image: Deltaport Way
Deltaport Way Hwy 17 (South Fraser Perimeter Rd) at Deltaport Way in South Delta, looking north.
 
Webcam Image: Hwy 91 at No.6 Rd-E
Hwy 91 at No.6 Rd-E Hwy 91 (East-West Connector) at No.6 Rd, looking east.
Webcam Image: Hwy 91 at No.6 Rd-W
Hwy 91 at No.6 Rd-W Hwy 91 (East-West Connector) at No.6 Rd, looking West.
Webcam Image: Hwy 91 at No8 Rd-E
Hwy 91 at No8 Rd-E Hwy 91 at No.8 Rd on East-West Connector, looking east.
Webcam Image: Hwy 91 at No.8 Rd-W
Hwy 91 at No.8 Rd-W Hwy 91 at No.8 Rd on East-West Connector, looking west.

Webcam Image: Hwy 91 at Fraserwood-E
Hwy 91 at Fraserwood-E Hwy 91 at Fraserwood Way, on the East-West Connector, looking east.
Webcam Image: Hwy 91 at Fraserwood-W
Hwy 91 at Fraserwood-W Hwy 91 at Fraserwood Way, on the East-West Connecter, looking West.
Webcam Image: Alex Fraser Bridge - N
Alex Fraser Bridge – N Alex Fraser Bridge, mid-span, looking north.
Webcam Image: Alex Fraser Bridge - S
Alex Fraser Bridge – S Alex Fraser Bridge, mid-span, looking south.
    
Webcam Image: Hwy 91 at 72nd-N
Hwy 91 at 72nd-N Hwy 91 at 72nd in Delta, looking north.
Webcam Image: Hwy 91 at 72nd-S
Hwy 91 at 72nd-S Hwy 91 at 72nd in Delta, looking south.
Webcam Image: Hwy 91 at 72nd-E
Hwy 91 at 72nd-E Hwy 91 at 72nd in Delta, looking east on 72nd.
 
Webcam Image: Hwy 91A_QB-W
Hwy 91A_QB-W Hwy 91A at Boundary Road, looking west.
Webcam Image: Hwy 91A_QB-E
Hwy 91A_QB-E Hwy 91A at Boundary Road, looking east.
Webcam Image: Hwy 91A at QBBR-S
Hwy 91A at QBBR-S North end of Queensborough Bridge, looking south
Webcam Image: Hwy 91A at QBBR-E
Hwy 91A at QBBR-E North end of Queensborough Bridge, looking east
Webcam Image: Hwy 91A at Howes-W
Hwy 91A at Howes-W Hwy 91A at Howes, looking west.
Webcam Image: Hwy 91A at Howes-E
Hwy 91A at Howes-E Hwy 91A at Howes, looking east.
  
Webcam Image: Wedge
Wedge Hwy 99, about 13 km north of Whistler at Riverside Drive, looking north.
Webcam Image: Whistler Village Gate - N
Whistler Village Gate – N Hwy 99, in Whistler at Village Gate Blvd, looking north.
Webcam Image: Whistler Village Gate - E
Whistler Village Gate – E Hwy 99, in Whistler at looking east on Village Gate Blvd.
 
    
Webcam Image: Function Junction
Function Junction Hwy 99 at Cheakamus Lake Rd, 5 km south of Whistler, looking north.
Webcam Image: Whistler Village Gate - S
Whistler Village Gate – S Hwy 99, in Whistler at Village Gate Blvd, looking south.
Webcam Image: Alice Lake
Alice Lake Hwy 99 at Squamish Valley Rd, about 10 km north of Squamish, looking north.
Webcam Image: Furry Creek
Furry Creek Hwy 99, about 12km south of Squamish, looking south.
Webcam Image: Marine Dr.
Marine Dr. Taylor Way/Marine Drive intersection, looking east toward Lions Gate Bridge.
Webcam Image: Taylor Way
Taylor Way Taylor Way at Marine Drive, looking north on Taylor Way.
Webcam Image: North End 2
North End 2 North end of Lions Gate Bridge, looking north.
Webcam Image: Georgia St.
Georgia St. Georgia St at Chilco, looking south.

Webcam Image: North End 1
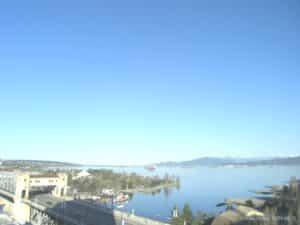
North End 1 North end of Lions Gate Bridge, looking south.
Webcam Image: Causeway
Causeway Stanley Park Causeway at Stanley Park Entrance, looking south.
  
Webcam Image: Oak St. 70th/N
Oak St. 70th/N Oak at 70th Ave., North Approach to Oak Street Bridge, looking north on Oak Street.
Webcam Image: Oak St. 70th/S
Oak St. 70th/S Oak at 70th Ave., North Approach to Oak Street Bridge, looking south to the bridge.
Webcam Image: Hwy 99 at Cambie Rd-N
Hwy 99 at Cambie Rd-N Hwy 99 at Cambie Rd in Richmond, looking north.
Webcam Image: Hwy 99 at Cambie Rd-S
Hwy 99 at Cambie Rd-S Hwy 99 at Cambie Rd in Richmond, looking south.
Webcam Image: Hwy 99 at Shell Road
Hwy 99 at Shell Road Hwy 99 at Shell Rd, approaching Oak St Bridge, looking north.
Webcam Image: Hwy 99 at Westminster Hwy-N
Hwy 99 at Westminster Hwy-N Hwy 99 at Westminster Hwy in Richmond, looking north.
Webcam Image: Hwy 99 at Westminster Hwy-S
Hwy 99 at Westminster Hwy-S Hwy 99 at Westminster Hwy in Richmond, looking south.
 
Webcam Image: Works Yard
Works Yard Hwy 99 at Delta Works Yard, looking north.
Webcam Image: Hwy 17A Overpass
Hwy 17A Overpass Hwy 99 from Hwy 17A overpass, looking north.
Webcam Image: Hwy 99 at Hwy 17A - River Rd
Hwy 99 at Hwy 17A – River Rd Hwy 99 at Hwy 17A overpass, looking east to 62B/River Rd.
Webcam Image: Hwy 99 at Hwy 17A - Northbound
Hwy 99 at Hwy 17A – Northbound Hwy 99, north of Hwy 17A overpass, looking north on Hwy 99 at northbound lanes.
Webcam Image: Hwy 99 at Hwy 17A - South
Hwy 99 at Hwy 17A – South Hwy 99, north of Hwy 17A overpass, looking south on Hwy 99 at northbound lanes.
Webcam Image: Hwy 99 at Hwy 17A - West
Hwy 99 at Hwy 17A – West Hwy 99 at Hwy 17A overpass, looking west to Hwy 17.
Webcam Image: South Approach
South Approach Hwy 99, north of Hwy 17A overpass, looking north.
Webcam Image: Deas
Deas Hwy 99 from north of Hwy 17A overpass, looking north.
Webcam Image: Steveston
Steveston Hwy 99, looking north from Steveston interchange.
Webcam Image: Blundell
Blundell Looking south between Blundell overpass and Steveston offramp.
  
Webcam Image: Hwy 99 at Mud Bay-W
Hwy 99 at Mud Bay-W Hwy 99 near Hwy 91 (Mud Bay) in Surrey, looking west on Hwy 99 (northbound).
Webcam Image: Hwy 99 at Mud Bay-E
Hwy 99 at Mud Bay-E Hwy 99 near Hwy 91 (Mud Bay) in Surrey, looking east on Hwy 99 (southbound).
Webcam Image: Hwy 99 at King George Blvd - N
Hwy 99 at King George Blvd – N Hwy 99 at King George Blvd, looking north.
Webcam Image: Hwy 99 at King George Blvd - S
Hwy 99 at King George Blvd – S Hwy 99 at King George Blvd, looking south.
Webcam Image: King George Blvd at Hwy 99 - W
King George Blvd at Hwy 99 – W King George Blvd at Hwy 99, looking west.
Webcam Image: King George Blvd at Hwy 99 - E
King George Blvd at Hwy 99 – E King George Blvd at Hwy 99, looking east.
Webcam Image: Hwy 99 - 32nd Ave Diversion - N
Hwy 99 – 32nd Ave Diversion – N Hwy 99, north of 32nd Ave Diversion, looking north.
Webcam Image: Hwy 99 - 32nd Ave Diversion - S
Hwy 99 – 32nd Ave Diversion – S Hwy 99, north of 32nd Ave Diversion, looking south.
Webcam Image: Pattullo Bridge Approach
Pattullo Bridge Approach Hwy 99A (King George Blvd) near 132nd St, looking east.
Webcam Image: Powell River
Powell River Hwy 101 at Loubert Rd in Powell River on the Sunshine Coast, looking south.
Webcam Image: Earls Cove
Earls Cove Hwy 101 at Egmont Rd, south of Earls Cove on the Sunshine Coast, looking South.
Webcam Image: Secret Cove
Secret Cove Hwy 101 at Brooks Rd on the Sunshine Coast, looking south.


SHARE THIS WEBCAM